Disabling deduplication while adding a mirror to a ZFS pool
Not enough RAM for deduplication
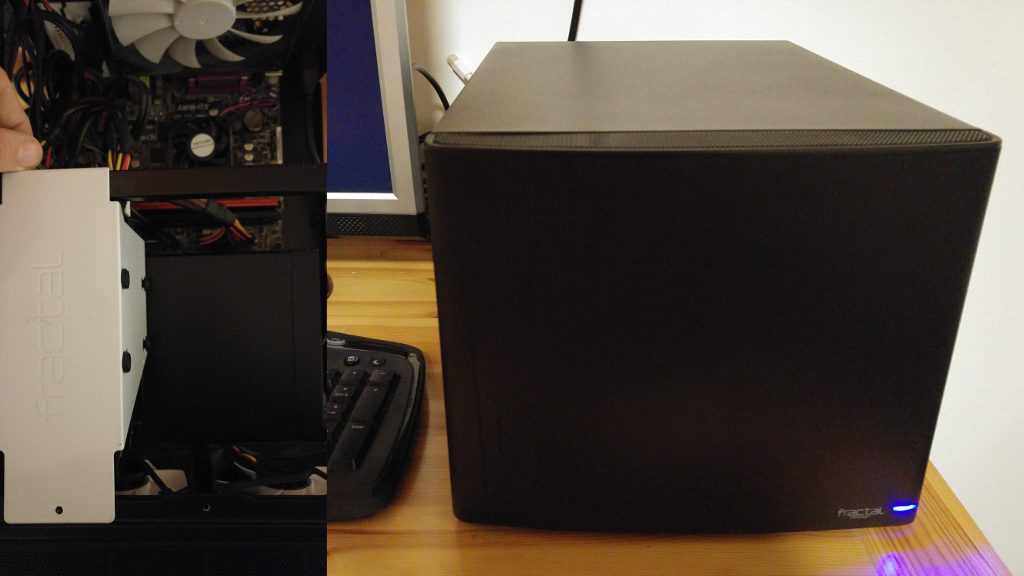
At some point I bought myself a small home server to toy around with and use as network storage. Later I learned about ZFS and decided to turn my server into only a storage solution using FreeNAS and use the cloud for toying around instead. My original build was:
- A single 3 TB
- 8 GB of RAM without ECC
- AMD Athlon 5350 ‘Kabini’ APU
- Fractal Design Node 304 case
I am one of those people who enabled deduplication not realizing exactly how severe the RAM requirements would be. After some months of usage my NAS slowed to a crawl when the deduplication table did not fit in RAM anymore.
At the time I just bought more RAM because I did not want to risk my data during the gymnastics of properly cleaning up that mess. I have some money and time right now, so I decided to add another disk as a mirror and finally disable deduplication.

Ways to undo deduplication
Turning off deduplication using the FreeNAS web interface or ZFS commands does not help, because this only affects newly created blocks while existing blocks remain in the deduplication table.
If your pool is relatively empty, you could just create a new dataset, where
you disable deduplication and use zfs send to copy your data
to the new dataset and then delete the old dataset.
My pool was more than 50 % full with one big dataset, so this was not an option for me. Using traditional file manipulation commands to gradually copy files from one dataset to the other was also not an option for me, since I wanted to keep all of my snapshots and metadata.
You can also buy more storage to extend the size of your ZFS pool so that your
pool becomes empty enough to use zfs send in place.
Since I only had one disk in my pool I decided to buy another disk instead, create
a new pool with only that disk, send my data over using zfs send and then add
the old disk to the new pool as a mirror.
Migrating data to the new pool
I bought another 3 TB disk and created a new pool with it. In FreeNAS this can be done in the Volume Manager. This time I made sure not to enable deduplication.
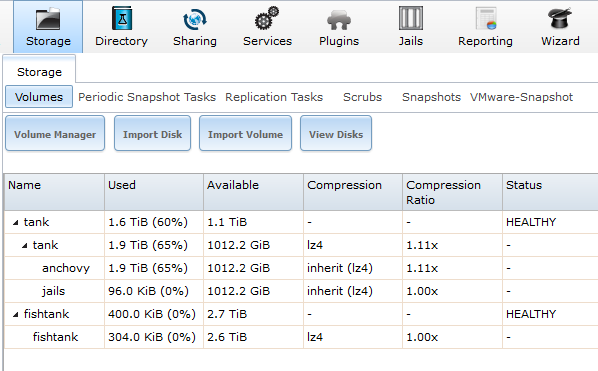
The old pool is called tank while the new pool is called fishtank.

Then I took a snapshot of the old pool. If you’re worried about changes that someone could make to the data after this point, you should make it read-only first.
[root@freenas ~]# zfs snap -r tank@migrate
Now I use zfs send to transfer all the data to the new pool.
[root@freenas ~]# zfs send -R tank/jails@migrate | zfs recv -v jails/anchovy
[root@freenas ~]# zfs send -R tank/anchovy@migrate | zfs recv -v fishtank/anchovy
After successfully copying everything to the new pool I used the Detach Volume command in the web interface to export the old pool without marking the disks as new and without deleting share configurations. Then I updated my share configurations and periodic tasks to point to the new pool and made sure that the new pool is the System dataset pool in the System tab and that the Jail root is set correctly. Since I created a new Volume I also had to make sure to back up my encryption keys for that volume. This completes the migration to the new pool.
Adding the old disk to the new pool as a mirror
If your pool is encrypted using GELI I would I actually recommend that you wait for FreeNAS 10 later this month, where the web interface should have support for adding a mirror to a single drive and will handle all of the encryption bits for you. The next section will cover those extra steps for encryption that I painstakingly performed with FreeNAS 9 while this section will show how to attach a mirror drive to your unencrypted pool.
First I take a quick look at how the drives are set up, using zpool status.
[root@freenas ~]# zpool status
  pool: fishtank
 state: ONLINE
  scan: scrub repaired 0 in 5h16m with 0 errors on Mon Jan  2 08:36:25 2017
config:

        NAME                                              STATE     READ WRITE CKSUM
        fishtank                                          ONLINE       0     0     0
          gptid/c77e37ca-cea2-11e6-93f1-d0509913e6c4.eli  ONLINE       0     0     0

errors: No known data errors

  pool: freenas-boot
 state: ONLINE
  scan: scrub repaired 0 in 0h2m with 0 errors on Fri Dec 23 03:47:48 2016
config:

        NAME                                          STATE     READ WRITE CKSUM
        freenas-boot                                  ONLINE       0     0     0
          gptid/05c05af3-ac03-11e5-b621-d0509913e6c4  ONLINE       0     0     0

errors: No known data errors
FreeNAS does not use the whole disk for ZFS, but creates a GPT table with a small swap partition, which makes sense for a consumer setup, but it also means that we have to use ´glabel´ to find out the gptids of our partitions.
[root@freenas ~]# glabel status
                                      Name  Status  Components
gptid/cf1b3c20-ad6a-11e5-854c-d0509913e6c4     N/A  ada0p2
gptid/c77e37ca-cea2-11e6-93f1-d0509913e6c4     N/A  ada1p2
gptid/05b8f045-ac03-11e5-b621-d0509913e6c4     N/A  da0p1
gptid/05c05af3-ac03-11e5-b621-d0509913e6c4     N/A  da0p2
gptid/cf0cfb40-ad6a-11e5-854c-d0509913e6c4     N/A  ada0p1
Inspecting the partition tales of our disks we can determine which partition we want to add to the pool.
[root@freenas ~]# gpart show ada0
=>        34  5860533101  ada0  GPT  (2.7T)
          34          94        - free -  (47K)
         128     4194304     1  freebsd-swap  (2.0G)
     4194432  5856338696     2  freebsd-zfs  (2.7T)
  5860533128           7        - free -  (3.5K)

[root@freenas ~]# gpart show ada1
=>        34  5860533101  ada1  GPT  (2.7T)
          34          94        - free -  (47K)
         128     4194304     1  freebsd-swap  (2.0G)
     4194432  5856338696     2  freebsd-zfs  (2.7T)
  5860533128           7        - free -  (3.5K)
We want to add the second partition of ada0 to the pool, which is the zfs
partition on the old drive. Here it’s the one where the gptid begins with cf, while the
one beginning with c7 is already in the pool. If you don’t use encryption,
you can just add that partition to the pool now. If you do use encryption, you
will need to perform some extra steps and first and then modify the attach command
a bit. If your pool consists of encrypted drives, they will have .eli in the
end of their names if you run the ´zpool status´ command. If I didn’t use encryption
I could attach the old disk as a mirror of the new one like this:
Again, don’t do this if you run encryption and skip to the next section instead.
[root@freenas ~]# zpool attach fishtank gptid/c77e37ca-cea2-11e6-93f1-d0509913e6c4 gptid/cf1b3c20-ad6a-11e5-854c-d0509913e6c4
Some extra steps to handle encryption
For an encrypted pool, we first look for the key to the volume in a special directory.
[root@freenas ~]# ls /data/geli
160e4e30-85fa-4a5d-a943-7976f88d0f86.key
Then we can set up a new encrypted partition using that key. If you didn’t set a
passphrase for your pool, use the -P flag to indicate that, or you won’t be able
to decrypt the pool.
[root@freenas ~]# geli init -s 4096 -B none -K /data/geli/160e4e30-85fa-4a5d-a943-7976f88d0f86.key /dev/gptid/cf1b3c20-ad6a-11e5-854
c-d0509913e6c4
Enter new passphrase:
Reenter new passphrase:
Now you can attach the drive and it will show up if you run the status command.
[root@freenas ~]# geli attach -k /data/geli/160e4e30-85fa-4a5d-a943-7976f88d0f86.key /dev/gptid/cf1b3c20-ad6a-11e5-854c-d0509913e6c4

Enter passphrase:
[root@freenas ~]# geli status
                                          Name  Status  Components
gptid/c77e37ca-cea2-11e6-93f1-d0509913e6c4.eli  ACTIVE  gptid/c77e37ca-cea2-11e6-93f1-d0509913e6c4
                                    ada1p1.eli  ACTIVE  ada1p1
gptid/cf1b3c20-ad6a-11e5-854c-d0509913e6c4.eli  ACTIVE  gptid/cf1b3c20-ad6a-11e5-854c-d0509913e6c4
Add the drive to the pool to start the resilvering process.
[root@freenas ~]# zpool attach fishtank gptid/c77e37ca-cea2-11e6-93f1-d0509913e6c4.eli gptid/cf1b3c20-ad6a-11e5-854c-d0509913e6c4.el
i
ZFS should report the drive as a mirror now and indicate that it’s resilvering to include the new drive into the pool. This will take a long time.
[root@freenas ~]# zpool status
  pool: fishtank
 state: ONLINE
status: One or more devices is currently being resilvered.  The pool will
        continue to function, possibly in a degraded state.
action: Wait for the resilver to complete.
  scan: resilver in progress since Mon Jan  2 18:04:26 2017
        1.22G scanned out of 1.90T at 69.5M/s, 7h58m to go
        1.22G resilvered, 0.06% done
config:

        NAME                                                STATE     READ WRITE CKSUM
        fishtank                                            ONLINE       0     0     0
          mirror-0                                          ONLINE       0     0     0
            gptid/c77e37ca-cea2-11e6-93f1-d0509913e6c4.eli  ONLINE       0     0     0
            gptid/cf1b3c20-ad6a-11e5-854c-d0509913e6c4.eli  ONLINE       0     0     0  (resilvering)

errors: No known data errors

  pool: freenas-boot
 state: ONLINE
  scan: scrub repaired 0 in 0h2m with 0 errors on Fri Dec 23 03:47:48 2016
config:

        NAME                                          STATE     READ WRITE CKSUM
        freenas-boot                                  ONLINE       0     0     0
          gptid/05c05af3-ac03-11e5-b621-d0509913e6c4  ONLINE       0     0     0

errors: No known data errors
Before you reboot now, you should test if you can decrypt both drives correctly
on the command line using your key. Detach them by running zpool offline and
then geli detach. You should be able to attach them again by running
geli attach and zpool online.
If this goes well, you can reboot and you will be in shock because your pool is degraded, since the old disk won’t be decrypted correctly at first. This will be fixed by exporting the volume and importing it again. Download your key using the web interface before you do the export. You can even create a recovery key.
Now the import should be successful and you pool should work. At this point I re-keyed my pool and rebooted.
Future expansion using striped mirrors
Once I hit the 3 TB capacity, I will just extend my dataset by another mirror of same sized disks. Generally any parity scheme is not a replacement for backups, so I’m also planning to build a really crappy NAS inside an old office PC with a bunch different HDDs and use that as a physically separate backup.